一、环境
| 主机 | 角色 | 私人FQDN | 私有IP地址 |
|---|---|---|---|
| NS1 | 主DNS服务器 | ns1.example.com | 192.168.87.141 |
| NS2 | 备DSN服务器 | ns2.example.com | 192.168.87.142 |
| 主机1 | 客户机器1 | host1.example.com | 192.168.87.151 |
| 主机2 | 客户机器2 | host2.example.com | 192.168.87.152 |
二、安装bind9
两个DNS服务器ns1和ns2上安装bind9
apt install bind9三、配置主DNS服务器
1.配置named.conf.options
/etc/bind/named.conf.options
- acl:访问控制列表,可信DNS客户端列表
- directory:域名文件存放的绝对路径
- forwarders:指定一个转发DNS,当本地域名服务器无法解析的域名,就会被转发至前向DNS进行解析
acl "trusted" {
        192.168.87.141;  # ns1 - can be set to localhost
        192.168.87.142;  # ns2
        192.168.87.151;  # host1
        192.168.87.152;  # host2
};

options {
        directory "/var/cache/bind";

        forwarders {
                8.8.8.8;            # google dns
                8.8.4.4;            # google secondary dns
        };

        dnssec-validation auto;

        auth-nxdomain no;    # conform to RFC1035
        listen-on-v6 { any; };
};
2.配置named.conf.local
/etc/bind/named.conf.local
- zone:定义一个区
- type:master - 表示定义的是主域名服务器; slave - 表示定义的是辅助域名服务器;hint - 表示是互联网中根域名服务器
zone "example.com" {
    type master;
    file "db.example.com";
    allow-transfer { 192.168.87.142; };    # ns2 private IP address - secondary
};

zone "168.192.in-addr.arpa" {
    type master;
    file "db.168.192";
    allow-transfer { 192.168.87.142; };    # ns2 private IP address - secondary
};
3.配置前向和反向区域
在/var/cache/bind/目录下创建数据文件
cp /etc/bind/db.local /var/cache/bind/db.example.com
cp /etc/bind/db.127 /var/cache/bind/db.168.192
编辑db.example.com
;
; BIND data file for local loopback interface
;
$TTL    604800
@       IN      SOA     ns1.example.com. admin.example.com. (
                              2         ; Serial
                         604800         ; Refresh
                          86400         ; Retry
                        2419200         ; Expire
                         604800 )       ; Negative Cache TTL
;

; name servers - NS records
@       IN      NS      ns1.example.com.
@       IN      NS      ns2.example.com.

; name servers - A records
ns1.example.com.          IN      A     192.168.87.141
ns2.example.com.          IN      A     192.168.87.142

; 192.168.0.0/16 - A records
host1.example.com.        IN      A     192.168.87.151
host2.example.com. IN A 192.168.87.152编辑db.168.192
;
; BIND reverse data file for local loopback interface
;
$TTL    604800
@       IN      SOA     example.com. admin.example.com. (
                              1         ; Serial
                         604800         ; Refresh
                          86400         ; Retry
                        2419200         ; Expire
                         604800 )       ; Negative Cache TTL
;

; name servers
@       IN      NS      ns1.example.com.
@       IN      NS      ns2.example.com.

; PTR Records
141.87  IN      PTR     ns1.example.com.        ; 192.168.87.141
142.87  IN      PTR     ns2.example.com.        ; 192.168.87.142
151.87  IN      PTR     host1.example.com.      ; 192.168.87.151
152.87  IN      PTR     host2.example.com.      ; 192.168.87.152
四、配置备DSN服务器
1.配置named.conf.options
/etc/bind/named.conf.options
acl "trusted" {
        192.168.87.141;  # ns1
        192.168.87.142;  # ns2 - can be set to localhost
        192.168.87.151;  # host1
        192.168.87.152;  # host2
};

options {
        directory "/var/cache/bind";

        forwarders {
                8.8.8.8;            # google dns
                8.8.4.4;            # google secondary dns
        };

        dnssec-validation auto;

        auth-nxdomain no;    # conform to RFC1035
        listen-on-v6 { any; };
};
2.配置named.conf.local
/etc/bind/named.conf.local
定义与主DNS服务器上的主区域对应的从属区域。 请注意,类型是“slave”,文件不包含路径,并且有一个masters指令应该设置为主DNS服务器的专用IP地址
zone "example.com" {
    type slave;
    file "db.example.com";
    masters { 192.168.87.141; };    # ns1 private IP
};

zone "168.192.in-addr.arpa" {
    type slave;
    file "db.168.192";
    masters { 192.168.87.141; };    # ns1 private IP
};
启动备dns,这时备dns自动同步主DNS的内容。自动在定义的工作目录内生成数据文件。
五、客户端测试
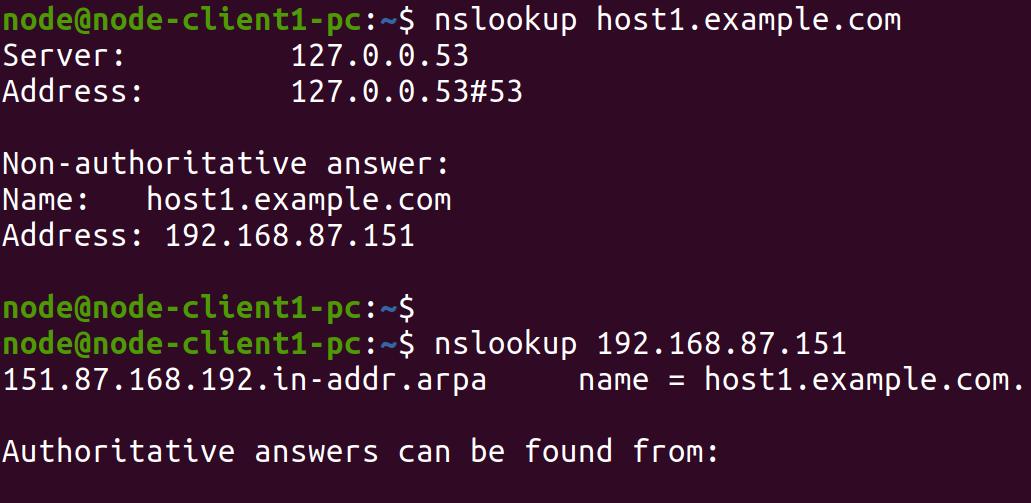
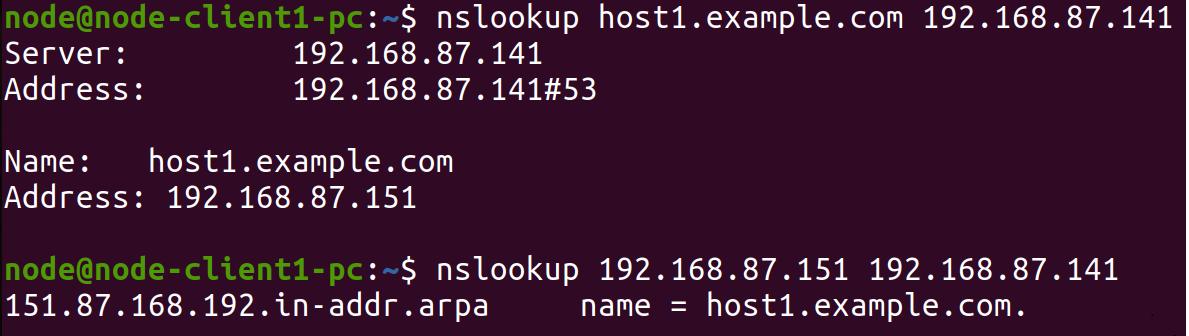
1.使用nslookup指定dns
nslookup domain [dns-server]
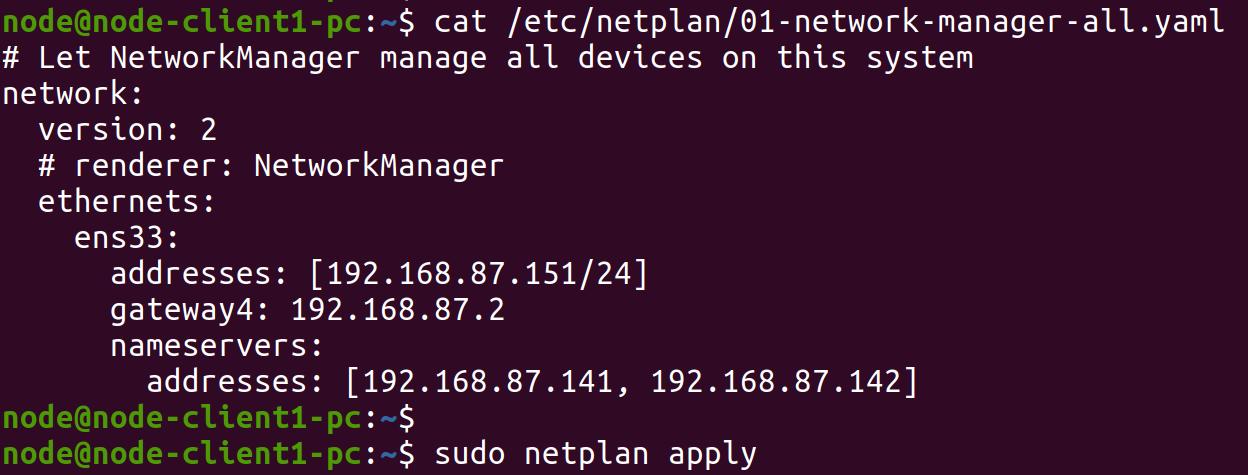
2.修改ubuntu18.04客户端dns
修改/etc/netplan/01-network-manager-all.yaml文件,设置dns
执行netplan apply命名
systemd-resolve --status查看dns
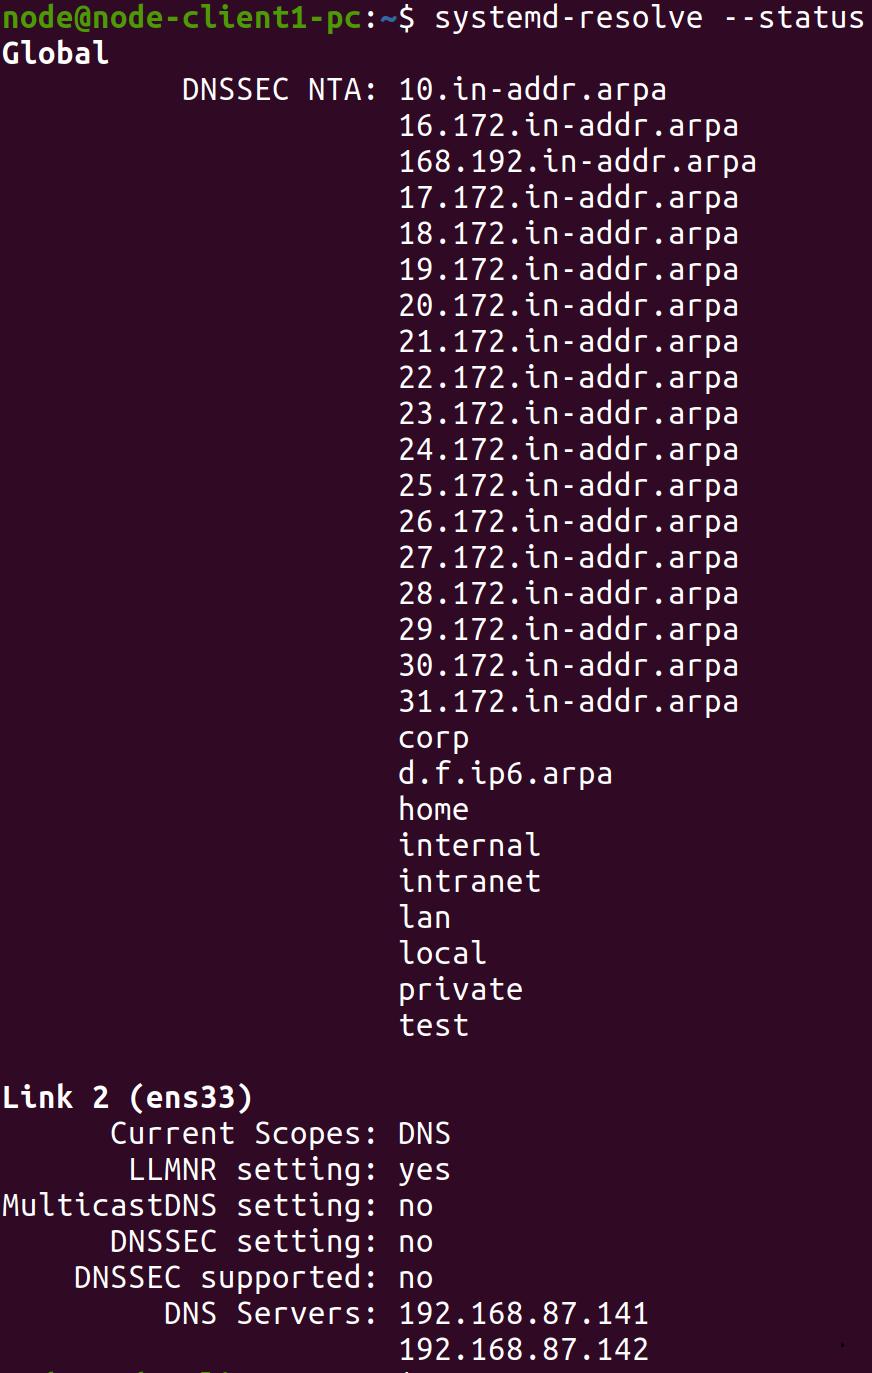
nslookup就会使用配置的dns